Connecting Your API to Knoon Agents Using OpenAPI Tool (Swagger)
Modern AI agents are no longer limited to answering questions. they can take real actions. Whether it’s creating orders, checking inventory, updating user data, or triggering workflows, agents become truly useful when they can interact with your backend.
That’s where OpenAPI tool comes in.
In this guide, we’ll explain what OpenAPI is, who needs it, the format it uses, and how to connect your own API to Knoon so your agents can call your endpoints safely and automatically.
What Is OpenAPI?
OpenAPI (formerly known as Swagger) is a standardized, machine-readable format for describing REST APIs.
Think of it as an instruction manual for your API written in a way that both humans and AI agents can understand.
This makes OpenAPI an ideal method for instructing Knoon agents how to interact with your system safely, without guessing, hallucinating, or hitting invalid endpoints.
Who Needs OpenAPI?
You should use OpenAPI in Knoon if you have your own backend or platform.
Examples:
- A SaaS app
- An e-commerce backend
- A CRM
- A booking system
- Inventory or POS APIs
You want your agent to take actions, not just answer questions such as:
- Creating a booking
- Reading product inventory
- Checking order status
- Updating customer profiles
- Retrieving invoices
- Triggering workflows
What Does the OpenAPI Format Look Like?
OpenAPI can be written in JSON or YAML.
Here is a simplified example:
{
  "openapi": "3.0.0",
  "info": {
    "title": "Example API",
    "version": "1.0.0",
    "description": "A simple example API."
  },
  "paths": {
    "/users": {
      "get": {
        "summary": "List all users",
        "operationId": "listUsers",
        "responses": {
          "200": {
            "description": "A list of users",
            "content": {
              "application/json": {
                "schema": {
                  "type": "array",
                  "items": { "$ref": "#/components/schemas/User" }
                }
              }
            }
          }
        }
      }
    },
    "/users/{id}": {
      "get": {
        "summary": "Get a user by ID",
        "operationId": "getUserById",
        "parameters": [
          {
            "in": "path",
            "name": "id",
            "required": true,
            "schema": { "type": "string" }
          }
        ],
        "responses": {
          "200": {
            "description": "User details",
            "content": {
              "application/json": {
                "schema": { "$ref": "#/components/schemas/User" }
              }
            }
          }
        }
      }
    }
  },
  "components": {
    "schemas": {
      "User": {
        "type": "object",
        "properties": {
          "id": { "type": "string" },
          "name": { "type": "string" },
          "email": { "type": "string" }
        }
      }
    }
  }
}
Adding an OpenAPI Tool in Knoon
Now that you understand the basics of OpenAPI, let’s walk through a quick tutorial on how to add an OpenAPI tool in Knoon using the Swagger Pet Store example.
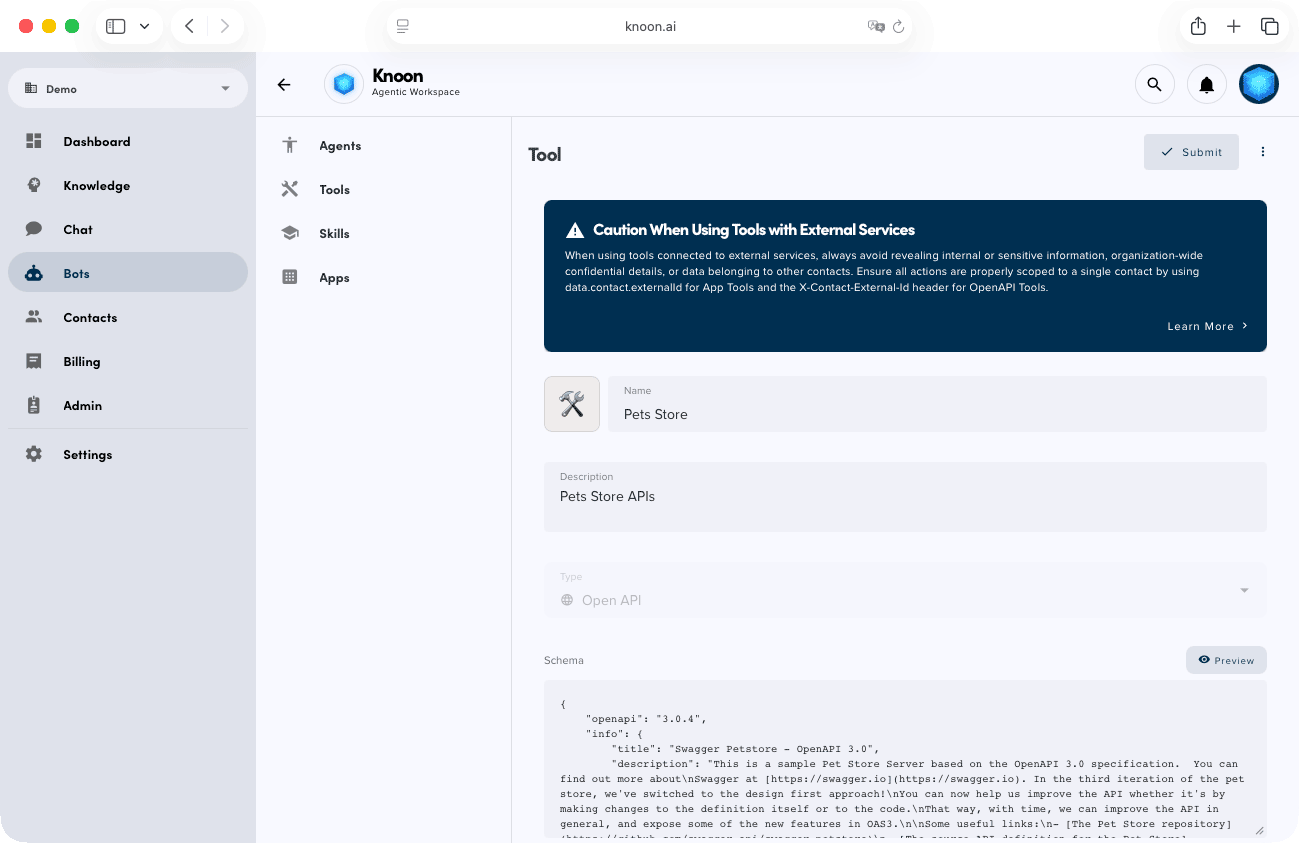
- Open Knoon
- Navigate to Bots → Tools
- Click Create
- Enter a name and description for your tool. If you want to give the LLM additional context, enable “Provide alternative description to LLM.”
- Set the Type to OpenAPI
- Paste the Swagger Pet Store JSON into the schema field
- Click Submit
Next, attach the tool to an agent:
- Navigate to Bots → Agents
- Select the agent you want to enhance
- Under Tools, choose the OpenAPI tool you just created
- Click Submit
You’re now ready to test your OpenAPI integration and watch your agent call real endpoints with intelligent, safe responses.
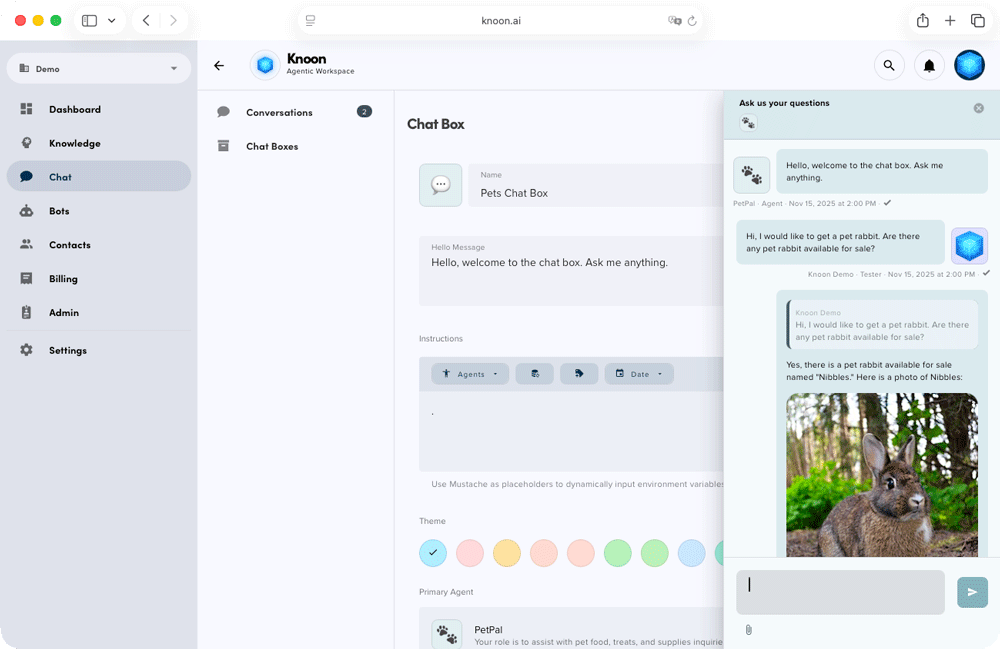
Testing OpenAPI Integration & Agent Responses
Let’s test your Knoon agent’s capabilities with the OpenAPI integration.
- Navigate to Chat → Chatboxes
- Select your chatbox → ⋮ → Test
- Start a conversation with the agent
Try asking something like: “Do you have any pet rabbits available?”
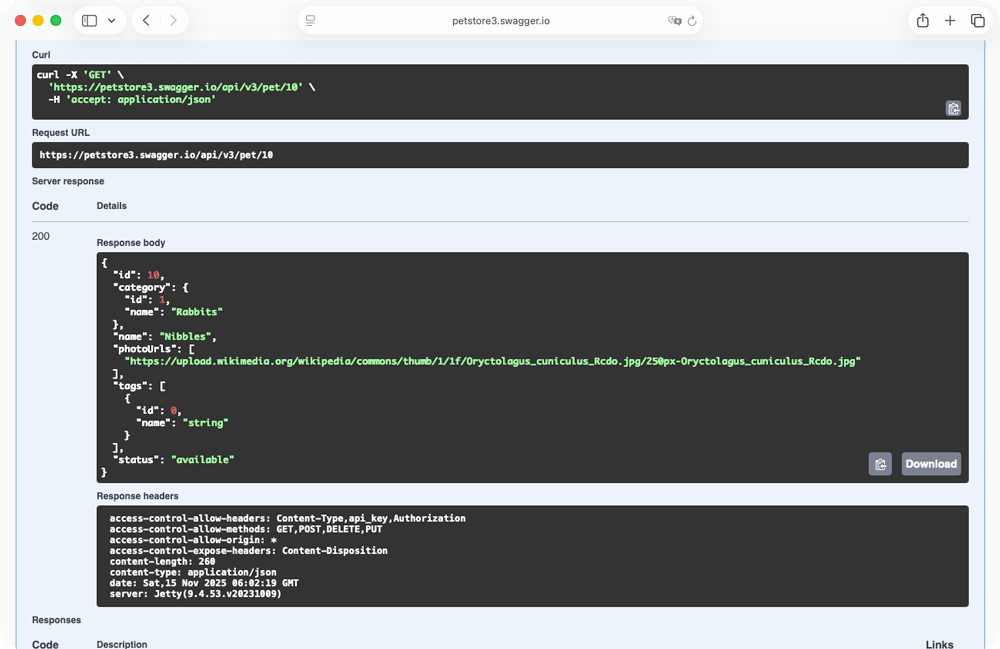
The agent will call the findByStatus endpoint behind the scenes and search for pets with the category “rabbit”. In our example test, the agent successfully found a rabbit named “Nibbles”.
You can continue testing your Knoon agent by purchasing “Nibbles”. Since the /store/order endpoint is available in the Swagger Pet Store API, the agent can place the order on your behalf.
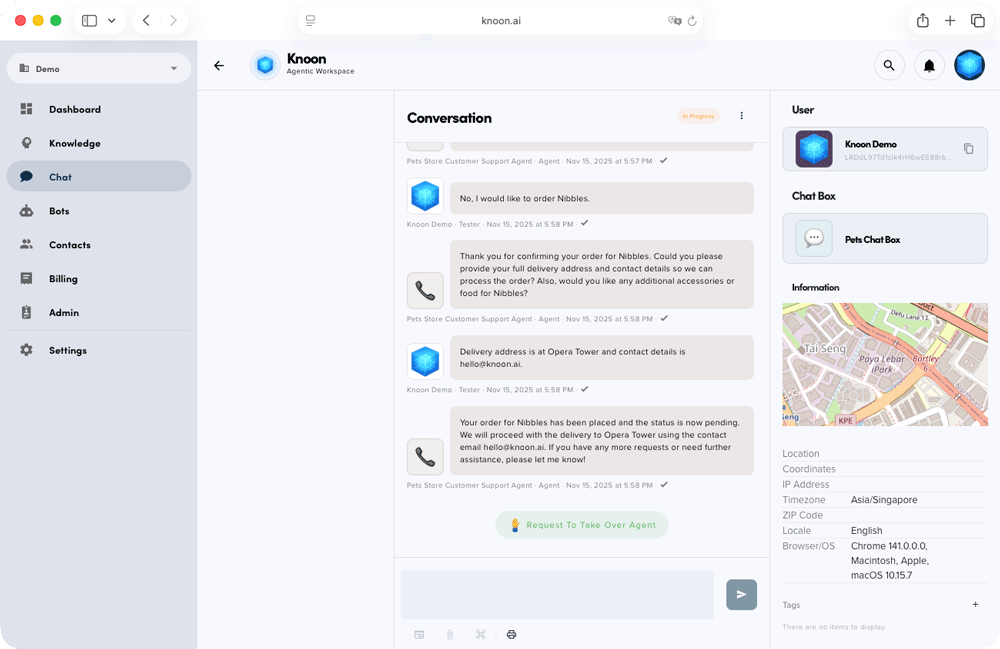
This showcases the Knoon agent’s remarkable versatility. It can effortlessly carry out end-to-end tasks and handle your work for you.
With OpenAPI connected, your agents can finally move beyond conversation and start taking meaningful action across your platform. This unlocks a new level of automation and intelligence inside Knoon.
We can’t wait to see what you build with it!