Connecting Microsoft Outlook Calendar to Knoon Agents Using Tools

When your business uses Outlook for scheduling (e.g. a clinic, consultancy or salon), it’s just as powerful to let your Knoon agents read availability, book appointments and update events, all automatically and in real time. This post shows you how to connect Microsoft Outlook Calendar to Knoon.
Why Outlook Calendar & Knoon
Many businesses (especially enterprises or those already on Microsoft 365) use Outlook Calendar as their main scheduling backbone.
With Outlook & Knoon, your agents can:
- Retrieve all calendars (personal, shared, team) the user has access to
- List events (to check existing bookings)
- Read free/busy info to find open slots
- Create new events (book appointments)
- Update existing events (reschedules, changes)
Essentially, the same capabilities you had with Google Calendar, now available for Outlook users.
Who Should Use Outlook Calendar with Knoon?
This integration is perfect for teams that run on scheduled appointments or time-based workflows, including:
- Clinics and healthcare providers managing consultations
- Hair salons and beauty services coordinating stylist schedules
- Wellness professionals like therapists, chiropractors, and trainers
- Sales or demo teams arranging product walkthroughs
- Operations teams planning staff shifts or room usage
- Service providers handling repairs, installations, or on-site visits
- Consultants and freelancers booking client sessions
- Educators or coaches organizing lessons and one-on-one meetings
If scheduling is central to your work, Knoon and Outlook Calendar make it faster, smoother, and fully automated without humans.
How to Create and Equip Outlook Calendar Tool in Knoon
Create a Microsoft Outlook Calendar Tool
Here’s how to set up the Outlook Calendar integration in Knoon.
- Open Knoon.
- Go to Bots → Tools.
- Press Create.
- Enter a name and description for your tool.
- (Optional) Enable Provide alternative description to LLM for clearer instructions.
- Choose App as the Tool Type.
- Press Select an App Action.
- Pick Microsoft → Outlook Calendar.
- Choose an action such as List Event, Create Event, Update Event, List Availability & more.
- Define your agent variables.
- Configure action payload if needed.
- Press Submit.
Attach the Tool to an Agent
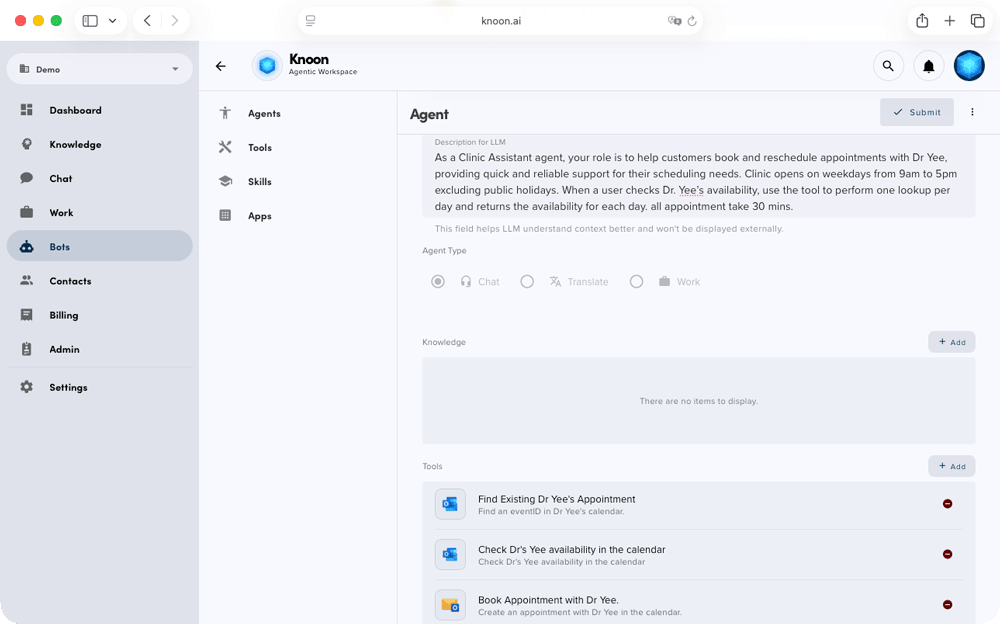
- Go to Bots → Agents.
- Select an agent.
- Scroll to the Tools section.
- Select the Outlook Calendar tool you created.
- Press Submit.
Your agent is now fully equipped to check availability, create appointments, and update events in Microsoft Outlook Calendar directly within conversations.
Demo Workflow: Booking Dr. Yee’s Appointment via Outlook
Let’s walk through the same test case once again but using Outlook Calendar.
A clinic assistant agent helps customers schedule appointments and checks whether the doctor is available. For this demo, we’ll assume there is one doctor i.e. Dr Yee.
Setup Outlook Calendar Tools
To automate scheduling for this example clinic workflow, you will create 5 Outlook Calendar tools:
- Check Availability (List Availability)
- Create Appointment (Create Event)
- Find Existing Appointment (Search events by extended properties)
- Update Appointment (Update Event)
- Cancel Appointment (Cancel Event)
Below is a step-by-step guide for setting up each tool.
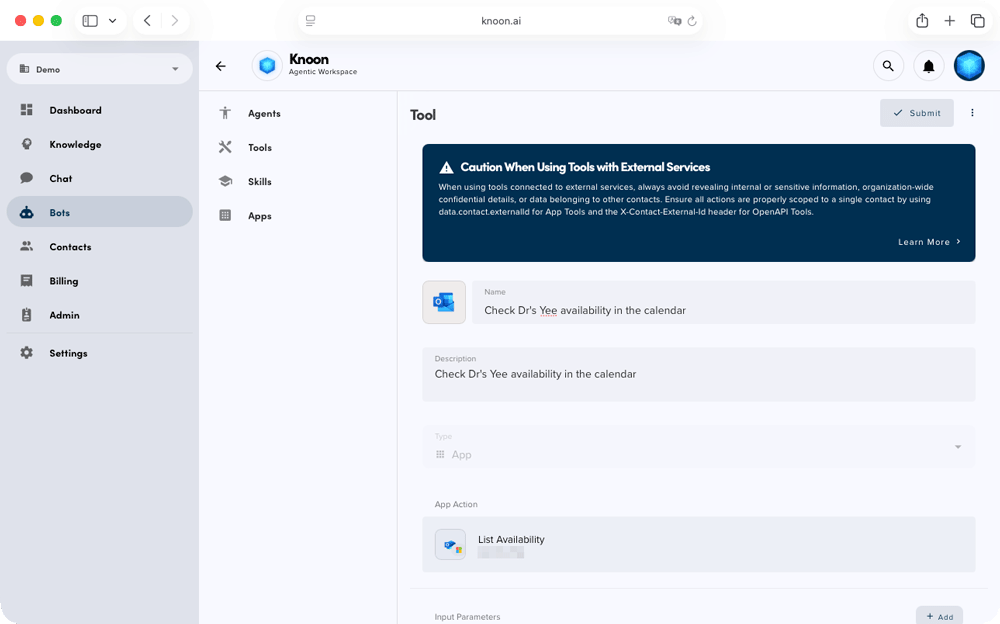
Check Dr Yee's Availability
- In the create a new tool page,
Name: Check Dr's Yee calendar
Description: List time slots of Dr Yee calendar. - Choose App as the Tool Type.
- Press Select an App Action.
- Pick Microsoft → Outlook Calendar → List Availability.
- Select Dr Yee's Outlook Calendar.
- Configure the agent variables.
Name:startDate
Description:Start date of the query in ISO8601.
Name:endDate
Description:End date of the query in ISO8601. - Configure the action payload.
start:{{startDate}}
end:{{endDate}}
durationMinutes:30 - Done!
Create Appointment in Dr Yee's Calendar
- In the create a new tool page,
Name: Book Appointment with Dr Yee.
Description: Create an appointment with Dr Yee in the calendar. - Choose App as the Tool Type.
- Press Select an App Action.
- Pick Microsoft → Outlook Calendar → Search.
- Select Dr Yee's Outlook Calendar.
- Configure the agent variables.
Name:start-time
Description:Start date time of the appointment with Dr Yee in ISO8601.
Name:end-time
Description:End date time of the appointment with Dr Yee in ISO8601.
Name:title-appointment
Description:Title of the appointment
Name:summarise-appointment
Description:A summary of the appointment - Configure the action payload.
summary:{{data.contact.email}} : {{title-appointment}}
Description:{{summarise-appointment}}.
startDateTime:start-time
endDateTime:end-time - Done!
Find Existing Dr Yee's Appointment
- In the create a new tool page,
Name: Find Existing Dr Yee's Appointment.
Description: Find an eventID in Dr Yee's calendar. - Choose App as the Tool Type.
- Press Select an App Action.
- Pick Microsoft → Outlook Calendar → Search events by extended properties.
- Select Dr Yee's Outlook Calendar.
- Configure the action payload.
Query:{{data.contact.email}} - Done!
Update an Appointment with Dr Yee
- In the create a new tool page,
Name: Update an Appointment with Dr Yee
Description: Update an Appointment in Dr Yee's calendar - Choose App as the Tool Type.
- Press Select an App Action.
- Pick Microsoft → Outlook Calendar → Update Event.
- Select Dr Yee's Outlook Calendar.
- Configure the agent variables.
Name:eventId
Description:eventID of the appointment that needs to be modified.
Name:start-time
Description:Start date time of the appointment with Dr Yee in ISO8601.
Name:end-time
Description:End date time of the appointment with Dr Yee in ISO8601.
Name:title-appointment
Description:Title of the appointment
Name:summarise-appointment
Description:A summary of the appointment - Configure the action payload.
eventID:{{eventID}}
summary:{{data.contact.email}} : title-appointment
Description:summarise-appointment
startDateTime:start-time
endDateTime:end-time - Done!
Cancel Existing Dr Yee's Appointment
- In the create a new tool page,
Name: Cancel Appointment in Dr Yee's Calendar
Description: Cancel Appointment in Dr Yee's Calendar - Choose App as the Tool Type.
- Press Select an App Action.
- Pick Microsoft → Outlook Calendar → Cancel Event
- Select Dr Yee's Outlook Calendar.
- Configure the agent variables:
Name:eventID
Description:This is the eventID of the appointment to be cancelled. - Configure the action payload.
eventID:{{eventId}} - Done!
Once the tools are setup, attach them to an agent and test its response.
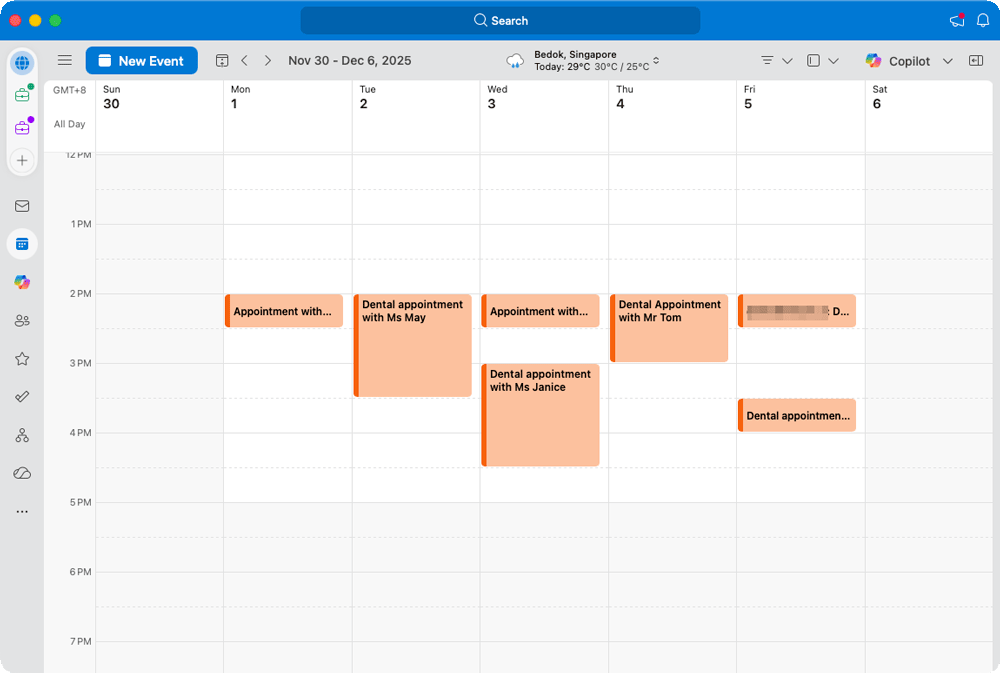
Ask the agent to find an available 1 PM slot the following week

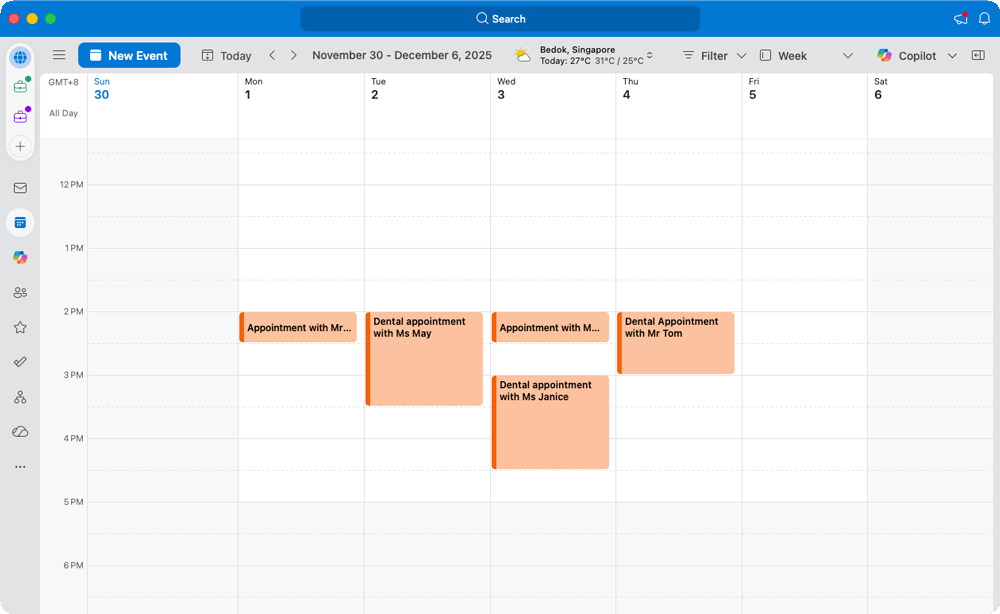
We began by asking the agent to look for a 2 PM appointment on any day the following week and to recommend the next available option. The agent reviewed Dr. Yee’s schedule and correctly reported that Dr. Yee was not free at 2 PM on December 1 to December 4. It then found an open 2 PM slot on Friday, December 5, and asked whether we would like to reserve it.

After checking Dr. Yee’s calendar, we confirmed that the booking appeared exactly as expected. The date and time were correct, the user’s email was captured, and the appointment title and summary matched the information we provided.

A solid start! 🥂
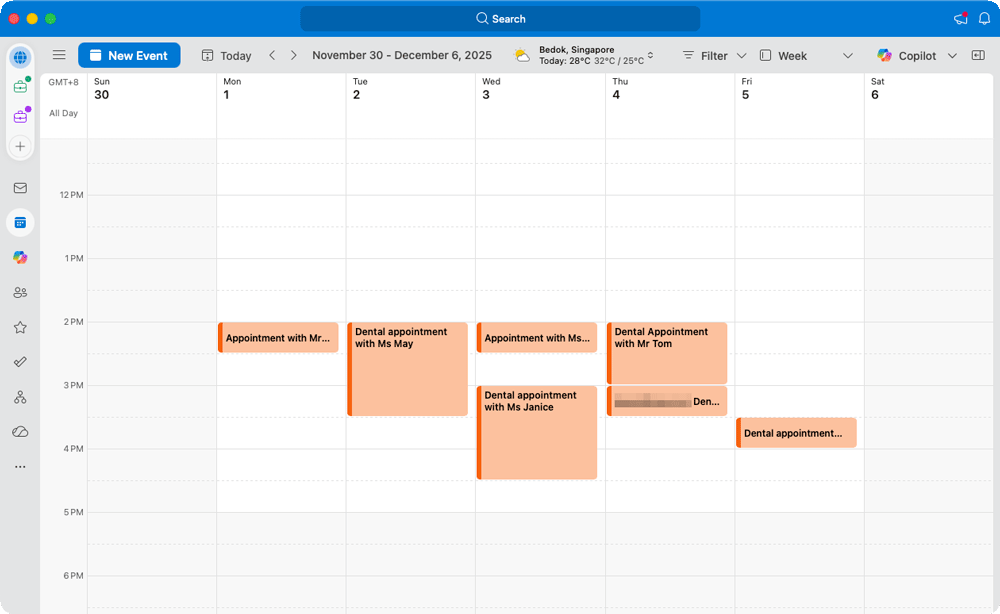
Change appointment to another date and time
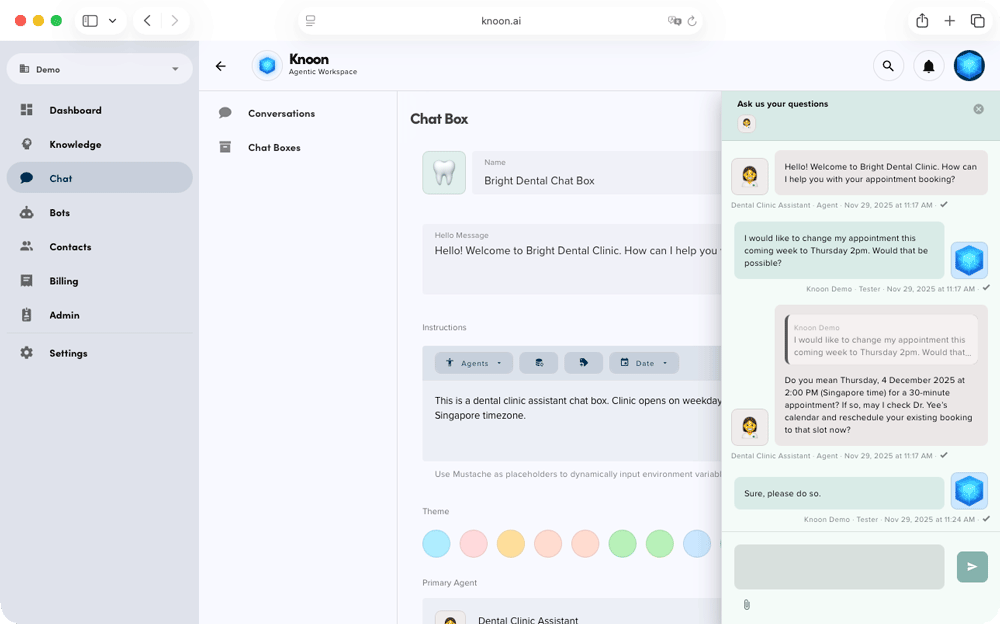
Next, we asked the agent to move the appointment to Thursday 2PM instead of keeping the Friday 2 PM slot. The agent searched for the appointment under the user’s email and reviewed Dr. Yee’s availability. It saw that the 2 to 3PM slot on Thursday was already taken and suggested a list of available slots.

Once we confirmed that 3PM on Thursday was suitable, the agent retrieved the event ID and updated the appointment to the new date and time without any issues.
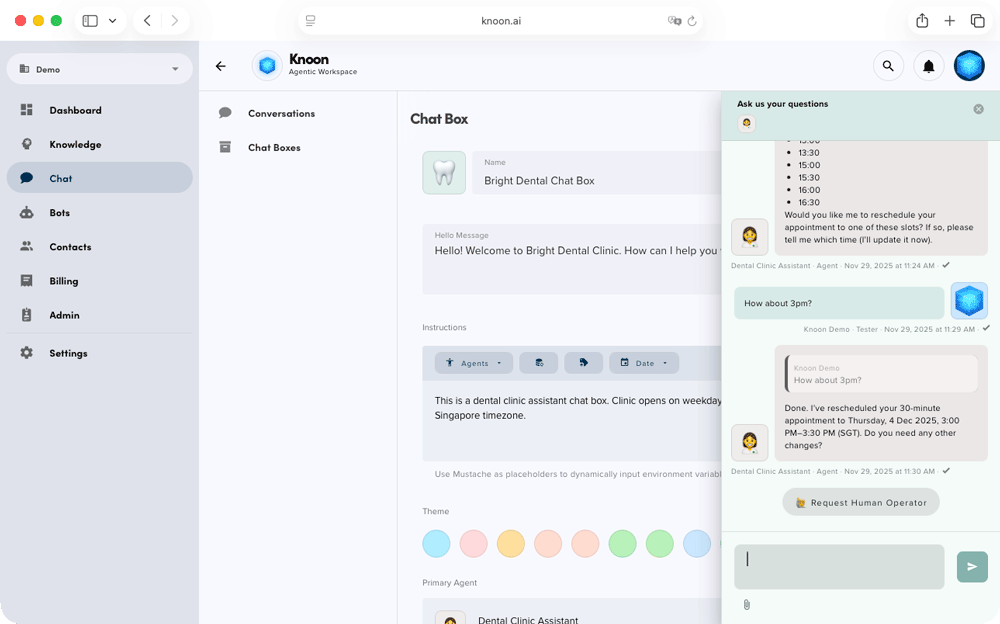
And just like that, the entire change was completed automatically, without a single person stepping in.
Cancel Appointment
Lastly, we tested appointment cancellation. In this scenario, the user had two appointments with Dr. Yee. We asked the agent to cancel all appointments for the week. The agent first clarified whether it should cancel a specific appointment or all of them.
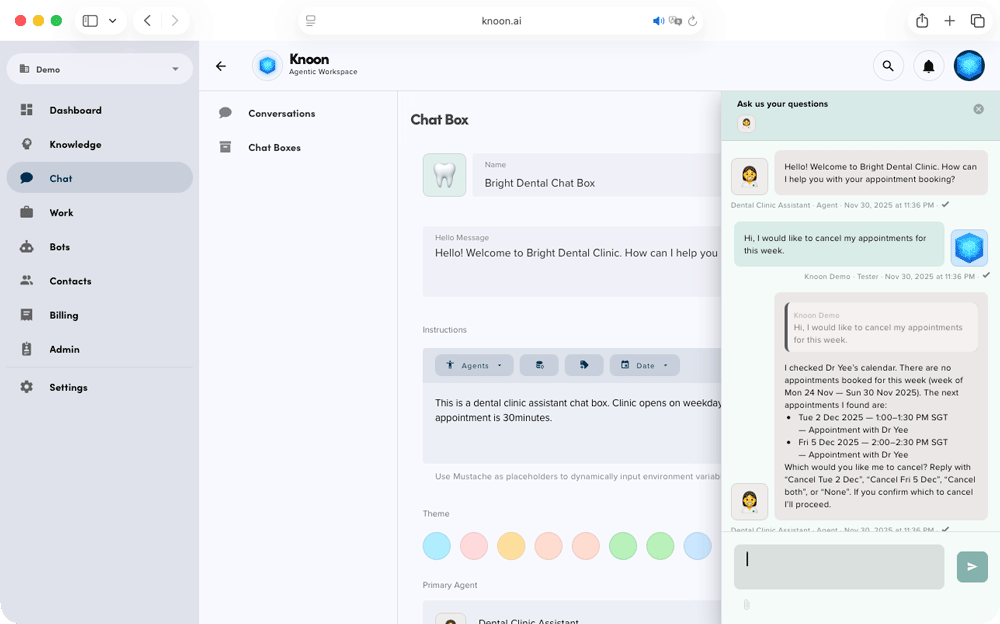
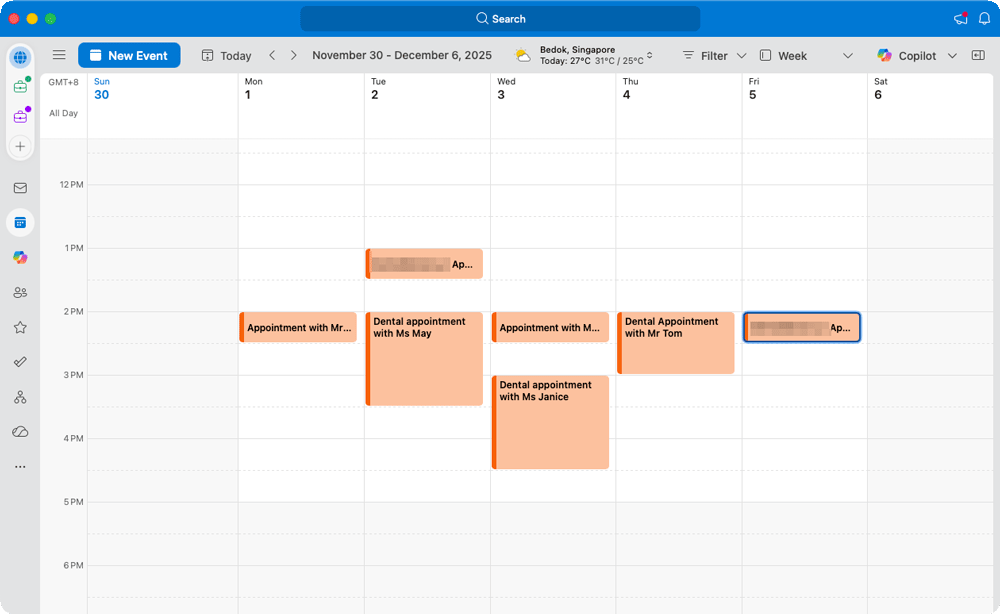
After the user confirmed, the agent located all events under the user’s email for that week and successfully cancelled them.
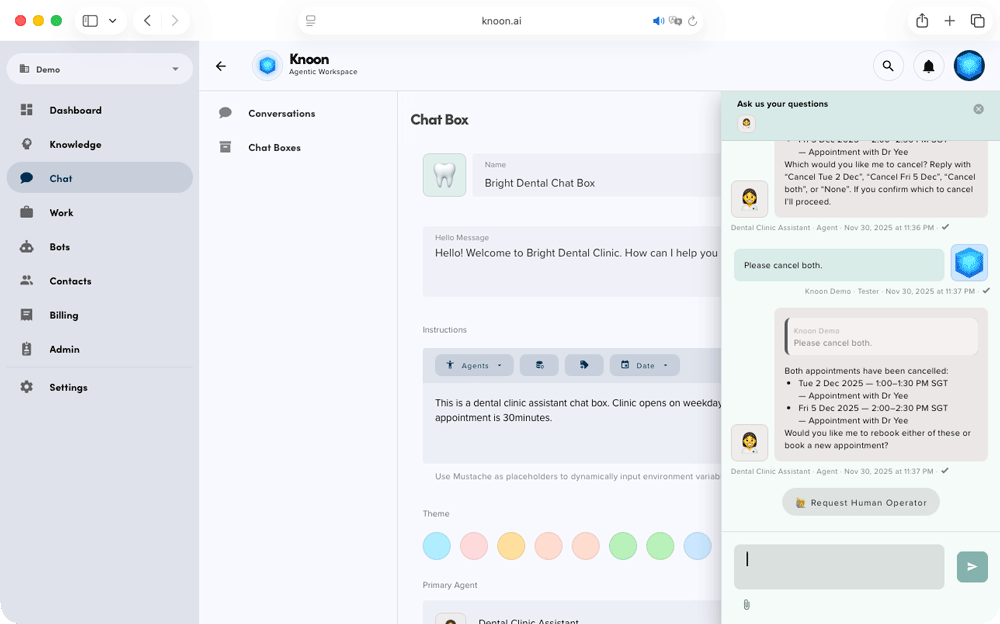
Yayyy! 👏🏻
By integrating Outlook Calendar with Knoon, you bring all the scheduling automation benefits to Outlook users. Whether you run a clinic, consultancy, salon, or any appointment-based business, this gives you a flexible way to let your AI agents handle bookings, availability checks, reschedules, and more...
...without manual effort.