Connecting Google Sheets to Knoon Agents Using Tools
Google Sheets is one of the simplest, most flexible ways to store structured data such as customer lists, inventory records, bookings, sales logs, subscriptions, you name it.
When you connect Google Sheets to a Knoon agent using tools, that data becomes actionable. Your agent can read from Sheets, write updates, find matching rows, and help automate real workflows directly from a conversation.
In this guide, we’ll walk you through how Google Sheets works inside Knoon, which tools are available, who needs this integration, and how to attach these tools to an agent to unlock powerful agentic automation.
Why Connect Google Sheets to Knoon?
Many teams already run essential operations on Google Sheets such as:
- Customer information
- Inventory tracking
- Lead lists
- Sales logs
- Appointment schedules
- Order records
- Internal notes
With Knoon, your agents can interact with these Google Sheets just like a human team member would except faster, and without switching tabs.
Agents can:
- Find customer records using an email or phone number
- Update inventory after a sale
- Log a new booking
- Append sales data
- Retrieve order history
- Generate summaries or reports based on Sheet values
In other words, Google Sheets becomes your agent’s lightweight backend database.
Who Should Use Google Sheets with Knoon?
This integration is ideal if your team:
- Operates a small business using Sheets as a database
- Manages CRM data in Google Sheets
- Runs booking, scheduling, or service logs in Sheets
- Tracks inventory or product lists
- Handles sales reporting in spreadsheets
- Doesn’t yet have a dedicated backend API
- Wants to give agents basic “system access” without heavy engineering work
For many companies, Google Sheets already is the backend. With Knoon, your agent now understands and works with that backend directly.
How to Add Google Sheets Tools in Knoon
Before using Google Sheets tools, make sure your Google integration is installed and authenticated inside Knoon.
- Open Knoon
- Navigate to Bots → Tools
- Click Create
- Enter a name and description for your tool. If you want to give the LLM additional context, enable “Provide alternative description to LLM.”
- Set the Type to App
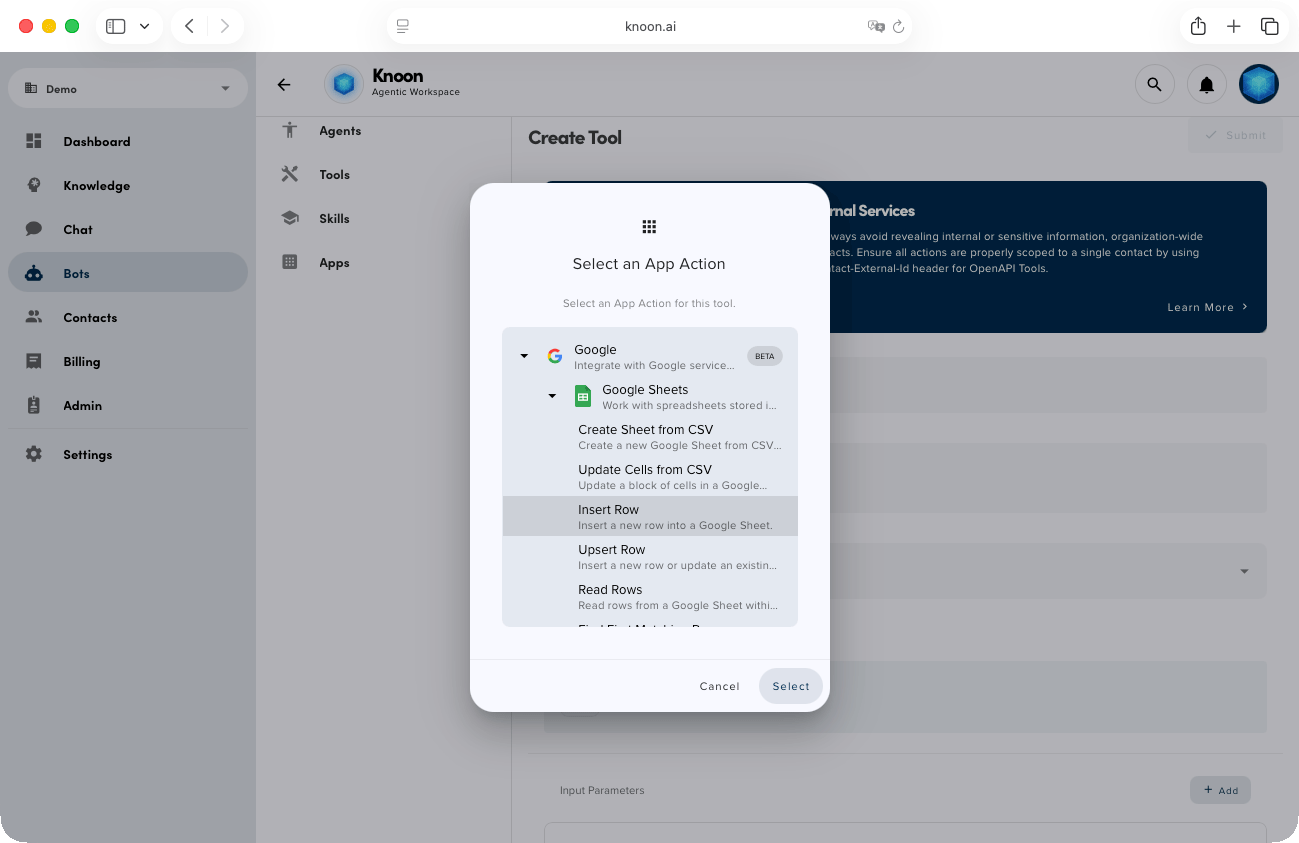
- Press Select an App Action
- Pick Google → Google Sheets
- Select a Google Sheets action
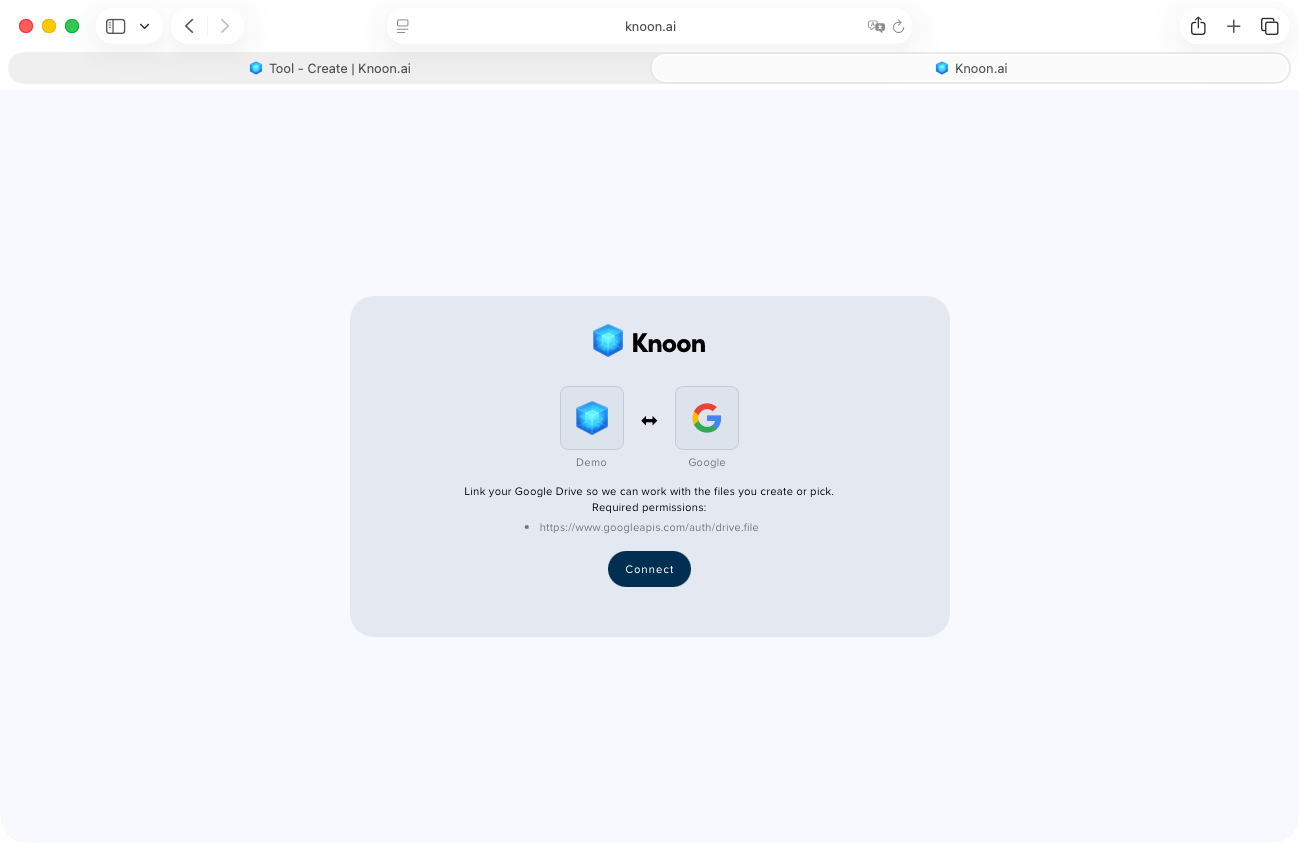
- Connect Knoon to your Google Sheets
Actions Supported in Google Sheets
Some of the Google sheets actions include:
Create Sheet from CSV
Create a new Google Sheet from a CSV file.
Update Cells from CSV
Overwrite or update a block of cells using CSV input.
Update Cells from CSV
Overwrite or update a block of cells using CSV input.
Insert Row
Add a new row into a Google Sheet.
Upsert Row
Insert or update a row based on a matching column.
Read Rows
Retrieve multiple rows or entire sections from a Sheet.
Find First Matching Row
Find the first row where a column matches a given value.
Find All Matching Rows
Find all rows where a column matches a given value.
Find First Cell
Search the entire sheet and return the first matching cell.
Find Cells
Search the entire sheet and return all matching cells.
Next, attach the tool to an agent:
- Navigate to Bots → Agents
- Select the agent you want to equip with the tool
- Under Tools, choose the Google Sheets tool you just created
- Click Submit
Example: Agent Capture User Feedback & Log to Google Sheets
Imagine you’re running a SaaS platform and relying on a Knoon chatbot to support users and collect feedback. By equipping your agent with the Google Sheets Insert Row tool, Knoon can automatically capture user feedback and log each submission directly into 2 worksheet tabs accordingly.
Here's how you can do it.

- Choose Google Sheets → Insert Row.
- Under Spreadsheet file, select the Google Sheet you want the agent to write to. Within the Google Sheets spreadsheet file, create 2 worksheet tabs i.e. FEATURE and BUG.
- Set Value input option to "USER_ENTERED" so Google Sheets can process formatting or formulas normally.
- Add input and output parameters.
Agent variables
These values will be collected by the agent during conversation.
Input Parameter 1: Type of feedback. This determines which worksheet tab will be written to. i.e. BUG or FEATURE
Name: feedback-type
Description: Strictly these values: "BUG" and "FEATURE"
Type: String
Input Parameter 2: Summarize user's feedback
Name: remarks
Description: Summarize remarks from the user
Type: String
Action payload
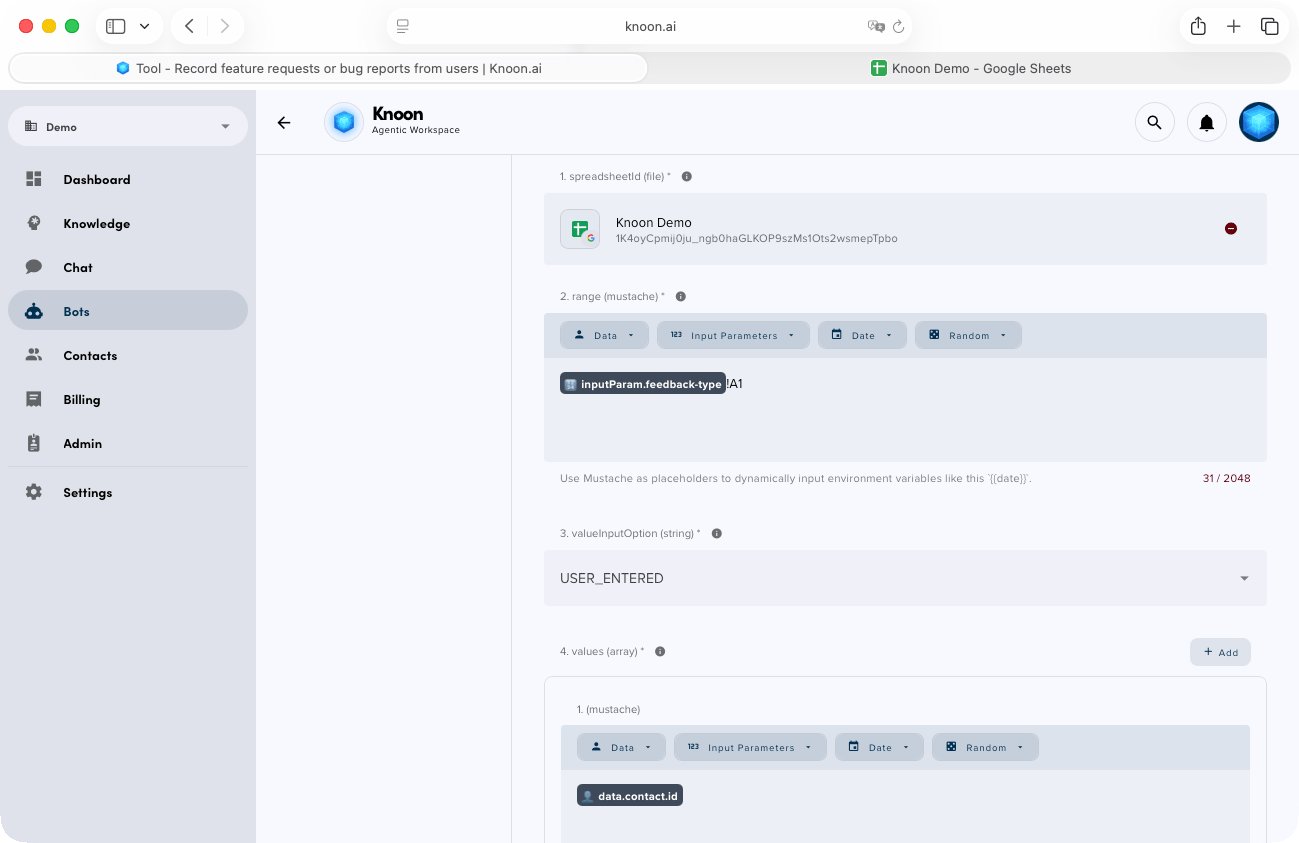
Range: specify where the new row should be inserted.
For example, {{inputParam.feedback-type}}!A1. This Mustache expression dynamically selects the correct worksheet tab based on the feedback type (e.g., BUG → BUG!A1).
Values: Configure row values. Under Values, add the 4 column values to be written into the spreadsheet. Example setup:
{{data.contact.id}} – Automatically captures the user/contact ID{{data.contact.email}} – Automatically captures the user’s email{{inputParam.remarks}} – User’s submitted feedback{{date.string}} – Timestamp of submission
It's time to test!
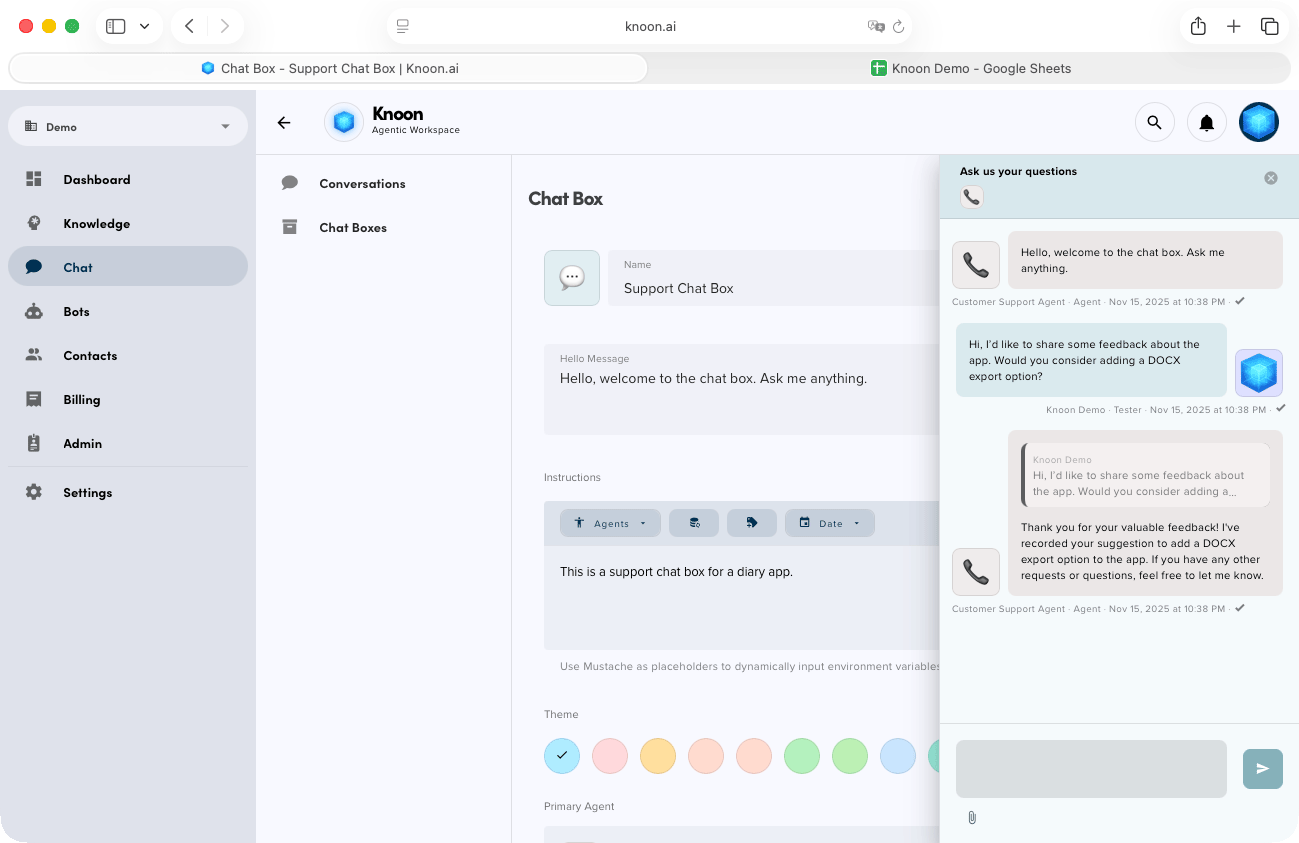
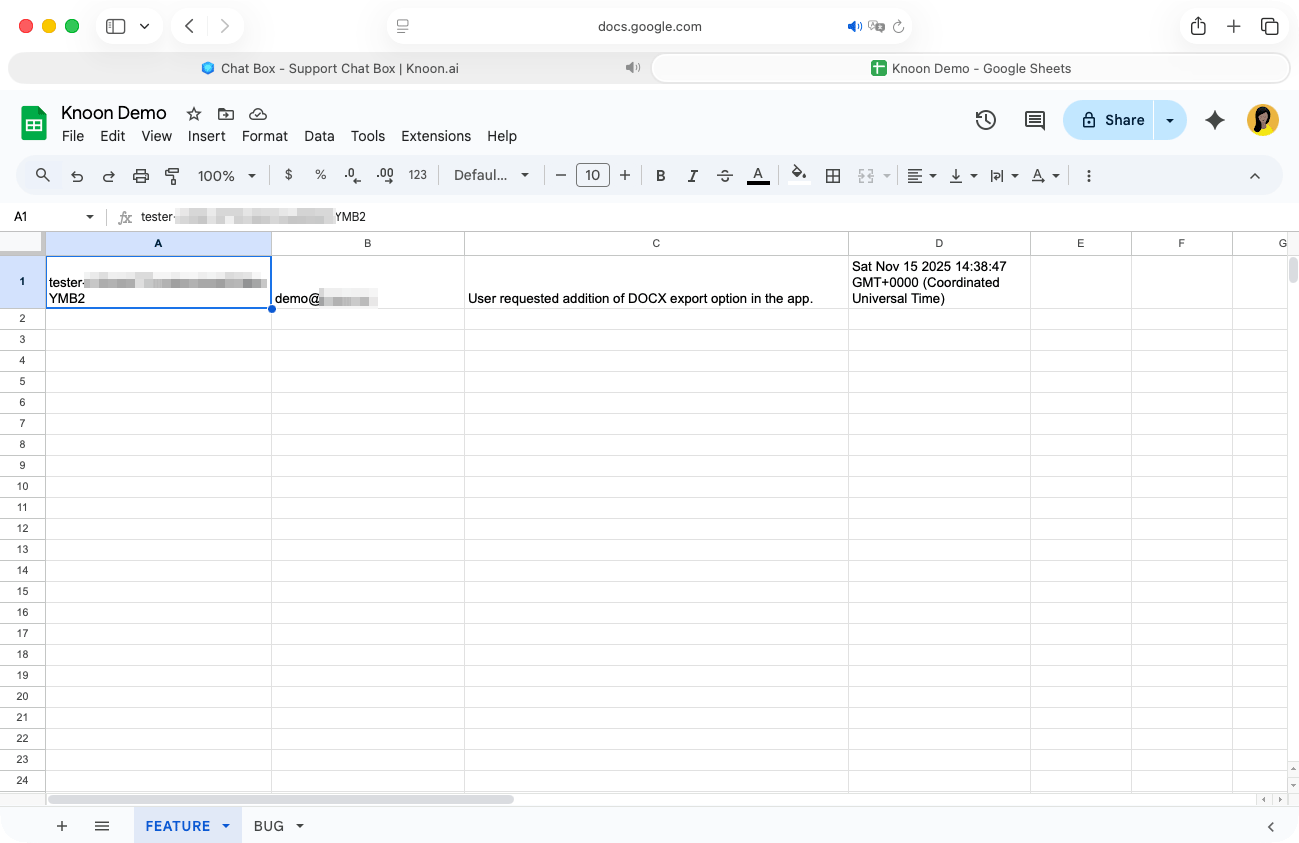
Let’s begin by testing the feedback workflow. In the chat, we shared a suggestion about adding a DOCX export option. The agent responded immediately and logged the request in the Google Sheet under the “feature” worksheet tab. Looking great so far!
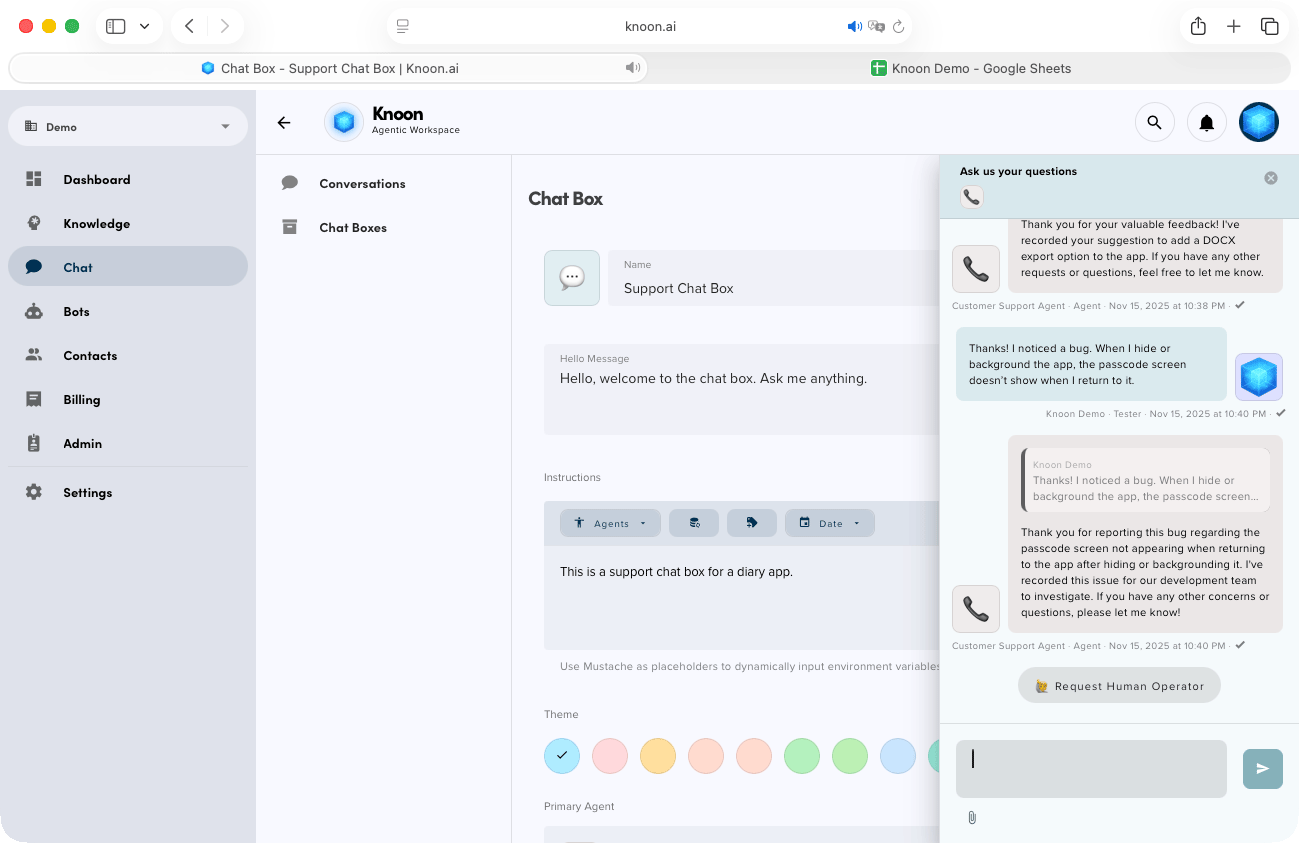
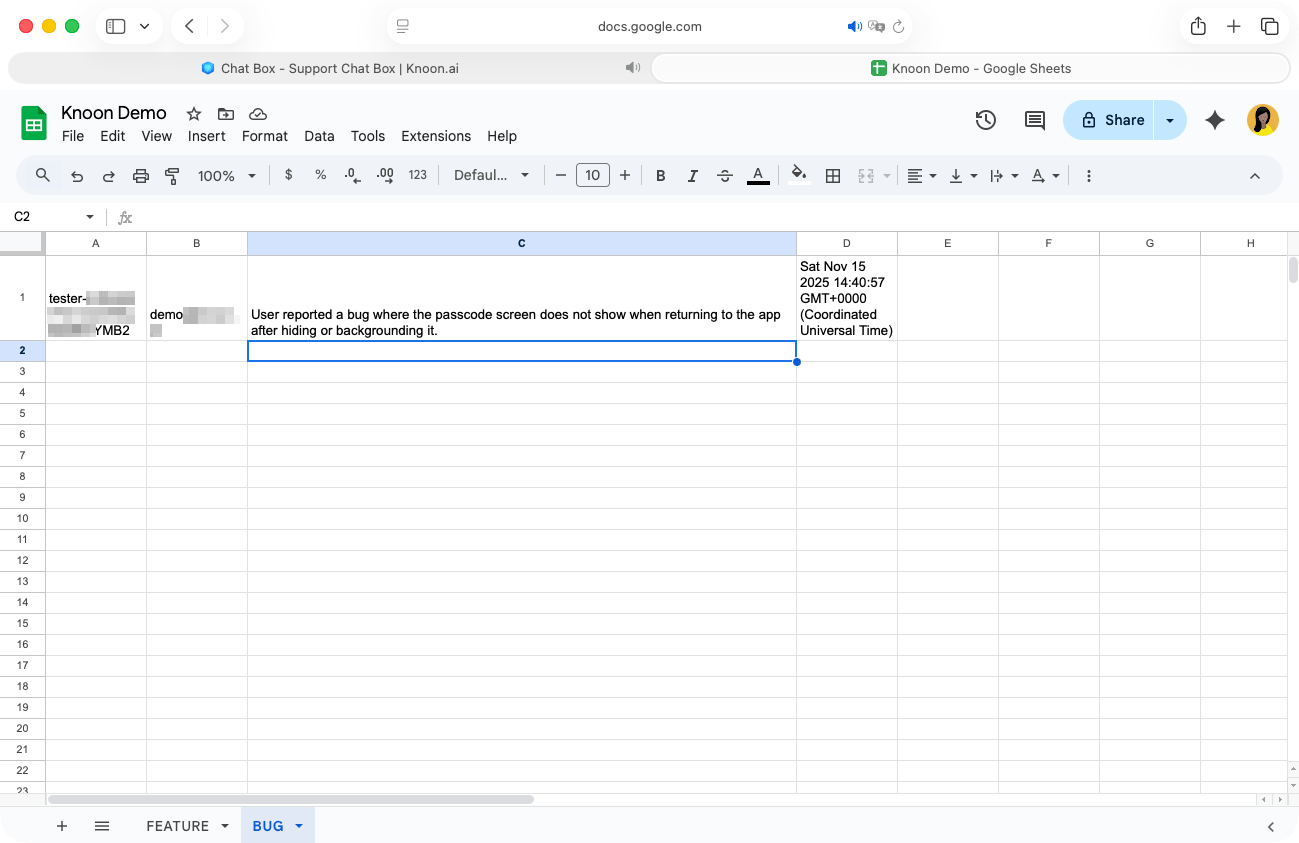
Next, we reported a bug: when the app is hidden or sent to the background, the passcode screen doesn’t appear when returning to it. The agent acknowledged the issue and recorded it for the development team to review. Checking the Google Sheet confirms this, the bug has been correctly added to the “bug” worksheet tab.
Connecting Google Sheets to your Knoon agent unlocks a powerful new way to automate real work from capturing feedback to updating records and managing operations. With these tools, your chatbot becomes a true assistant that acts, not just answers.
We can’t wait to see how you’ll use Google Sheets inside your chat experience.